Slicing our models with Cura
Cura is known for the fast update period, usually breaking the compatibility with previous versions makes the management of projects virtually impossible. However, it is possible to use this free slicing software in case you don’t want to buy the Simplify3D license for any reason. The following profiles, tips and tricks should help you on the way.
Note: Our stock gcodes provided with models are generated in Simplify3D. Cura generated gcodes can’t provide exactly the same results and is considered as an advanced/backup option. The files are created for Cura v4.8, functionality in the older or later version is not guaranteed.
Cura empty templates with profiles
All the templates contain a basic single-wall profile with all the parameters set to slice our models with internal structures including the initial 2-perimeter layer for better heat-bed adhesion. Templates also contain a basic profile for printing standard STL files with LW-PLA (50% flow, no retractions, extra priming after travel moves) and a basic LW-PLA vase mode profile for models designed to be printed this way, such as Bungee or Albatros DVa.
- 3DLabPrint_Cura_template_DD200x200 – a basic direct-drive extruder printer with build volume of 200x200x200 mm.
- 3DLabPrint_Cura_template_PrusaMK3 – Original Prusa MK3/S with build volume 250x210x210 mm. The bundle also contains experimental Linear Advance profile with nicer seams and slightly lighter parts.
Instructions:
- Open the 3mf file as a Project in Cura. The project will add or update a printer and associated profiles. The 3mf template already contains a modifier mesh 1mm high covering the whole heatbed with a 2-wall setting. Don’t remove that mesh.
- Import the STL to slice, you may import multiple models
- Rotate the part, so the seam is towards the x0;y0 origin
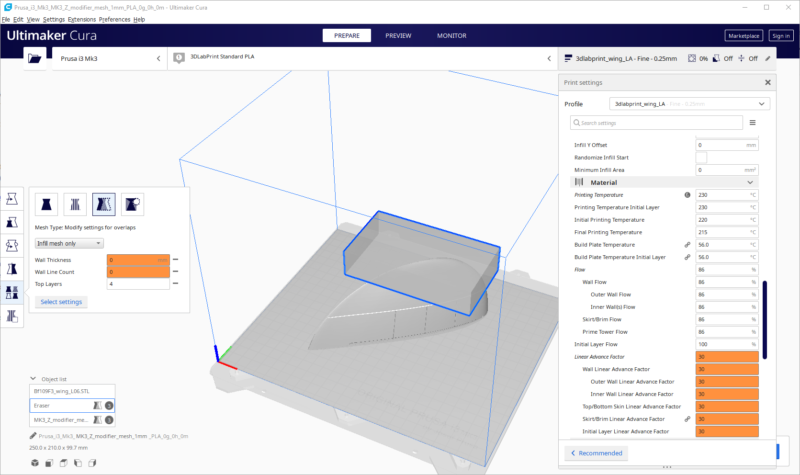
- You may need to add another modifier mesh (called Eraser as it’s usually used to erase supports) where you want to add some top layers or other features by clicking the 6th tool in the left toolbar and clicking on the spot on the model. Adjust the position and size of the modifier mesh, then with the modifier mesh selected using the 5th tool set the mesh to Modify Settings for Overlap type and from the dropdown select Infill Mesh Only. Adjust parameters you want or add any parameter required (cooling, flow, perimeters, …)
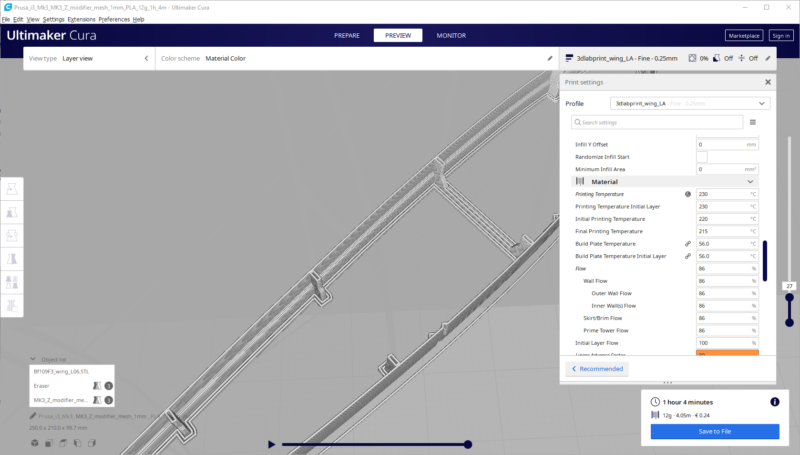
Note: check the preview of the slicing if any modifier is required. Common examples where modifiers are necessary:- 4 Bottom layers are required to fill horns on control surfaces, such as ailerons, elevators, rudders
- 3 Top layers are required for parts with steeper overhang angle, where the single wall print causes gaps, such as wingtips, etc…
Note: Check PDF user guides for specific flow rates used with LW-PLA planes. Some parts require different density.
Known issues
The basic Cura generated Gcode file is about twice larger than the same model Gcode generated in PrusaSlicer or Simplify3D. This can cause problems when printing via USB (Octoprint) on curved surfaces, where the nozzle makes tiny pauses resulting in blobs on the surface. SD printing is not affected. This issue can be also avoided by using Arc Welder plugin that can interpolate the G0/G1 lines with G2/G3 curves greatly reducing the resulting Gcode size.
Manual setup of the profile
The common issue is, the Cura is not slicing the models with all the internal structures. If you don’t want to use the preconfigured template, you can set your profile manually using the following values
Quality
- Layer Height: 0.25 mm (0.24 mm on Creality printers)
- Initial Layer Height: 0.2 mm
- Line Width: 0.42 mm
Shell
- Wall Line Count: 1
- Compensate Wall Overlaps: True
- Fill Gaps Between Walls: Everywhere
- Z Seam alignment: User Specified (can be set different position if required)
- Z Seam X: 0
- Z Seam Y: 0
Infill
- Infill density: 0
Material
- Pritning Temperature: 230°C (basic value, please consult the FAQ)
- Build Plate Temperature: 56°C (basic value, please consult the FAQ)
- Flow: 102% (basic value, please consult the FAQ)
Cooling
- Enable Print Cooling: False
Mesh Fixes
- Merged Meshes Overlap: 0
- Union Overlapping Volumes: False
- Remove Empty First Layers: False
Special Modes
- Surface Mode: Normal
- Spiralize Outer Contours: False
Experimental
- Slicing Tolerance: Exclusive
Another great source of information about how to print the planes is following instructional video by Stefan from CNC kitchen:
Merging multiple Gcodes
Note: this method is no longer required as we already have the modifier mesh functionality. The info is kept just for reference
You can also use different printing settings in various Z heights to simulate multiple processes in Simplify3D.
For example, the wing joint of the wing part 3A on F4U needs to be printed with 2 perimeters, so it’s strong enough.
Kyle T. Currier from 3d LabPrint Pilots Association Facebook Group made an instructional video, on how to achieve this by using Cura, and manually merging multiple Gcodes with a text editor.


